




Are there any installation instructions for Wrench Rails?
 Aug 04, 2025|
 Hey there! As a supplier of Wrench Rails, I often get asked if there are any installation instructions for these nifty tools. Well, you bet there are, and I'm here to break it down for you in plain English.
First off, let's talk about why installation instructions matter. Wrench Rails are precision tools, and getting them installed correctly is crucial for their performance and your safety. Whether you're a professional in the railway industry or a DIY enthusiast working on a small rail project, following the right steps can make all the difference.
Types of Wrench Rails and Their Installation
We offer a variety of Wrench Rails, each with its own unique features and installation requirements. Let's take a look at some of the popular ones:
Single Socket Rail Bolt Wrench
The Single Socket Rail Bolt Wrench is a workhorse when it comes to tightening and loosening rail bolts. Installing this bad boy is relatively straightforward, but there are a few key steps to keep in mind.
- Prepare the Work Area: Before you start, make sure the area around the rail is clean and free of debris. This will prevent any interference during the installation process.
- Position the Wrench: Place the Single Socket Rail Bolt Wrench over the rail bolt you want to work on. Ensure that the socket fits snugly around the bolt head.
- Secure the Wrench: Use the provided locking mechanism to secure the wrench in place. This will prevent it from slipping during operation.
- Connect the Power Source: Depending on the model, you may need to connect the wrench to a power source, such as a battery or an air compressor. Follow the manufacturer's instructions for proper connection.
- Test the Wrench: Before you start tightening or loosening bolts, test the wrench to make sure it's working properly. This will help you avoid any issues down the line.
Light Weight Portable Rail Bolt Wrench
The Light Weight Portable Rail Bolt Wrench is a great option for those who need to work in tight spaces or on the go. Here's how to install it:
- Inspect the Wrench: Before installation, carefully inspect the wrench for any damage or defects. If you notice anything wrong, contact our customer support team right away.
- Attach the Socket: Select the appropriate socket for the rail bolt you'll be working on and attach it to the wrench. Make sure it's securely fastened.
- Adjust the Torque Setting: Depending on the specific requirements of your project, you may need to adjust the torque setting on the wrench. Refer to the user manual for detailed instructions.
- Position the Wrench: Place the wrench over the rail bolt and align it properly. Apply gentle pressure to ensure a good fit.
- Start Working: Once the wrench is properly installed and positioned, you're ready to start tightening or loosening bolts. Remember to follow all safety precautions and use the wrench as directed.
Battery Torque Wrench smart torque wrench
The Battery Torque Wrench smart torque wrench is a high-tech option that offers precise torque control. Installing this wrench requires a bit more attention to detail, but it's still a manageable process.
- Charge the Battery: Before you start installation, make sure the battery is fully charged. This will ensure optimal performance and prevent any interruptions during operation.
- Install the Socket: Select the appropriate socket for the rail bolt and install it on the wrench. Make sure it's securely attached and properly aligned.
- Program the Torque Setting: Use the built-in display and controls to program the desired torque setting. This will ensure that you apply the correct amount of force to each bolt.
- Position the Wrench: Place the wrench over the rail bolt and engage the locking mechanism. Make sure the wrench is firmly in place before you start operating it.
- Test the Wrench: After installation, test the wrench to make sure it's working properly. Check the torque setting and make any necessary adjustments.
General Tips for Installation
Regardless of which type of Wrench Rail you're installing, there are a few general tips that can help make the process go smoothly:
- Read the Manual: Always read the user manual carefully before you start installation. This will provide you with important information about the specific features and requirements of your wrench.
- Use the Right Tools: Make sure you have all the necessary tools on hand before you start installation. This includes things like wrenches, sockets, and screwdrivers.
- Follow Safety Precautions: Wrench Rails can be dangerous if not used properly. Always wear appropriate safety gear, such as gloves and safety glasses, and follow all safety instructions provided by the manufacturer.
- Take Your Time: Installation is not a race. Take your time to ensure that each step is done correctly. This will help prevent any mistakes or issues down the line.
Conclusion
So, there you have it! Installation instructions for Wrench Rails are essential for ensuring proper performance and safety. Whether you're using a Single Socket Rail Bolt Wrench, a Light Weight Portable Rail Bolt Wrench, or a Battery Torque Wrench smart torque wrench, following the right steps is key.
If you have any questions or need further assistance with installation, don't hesitate to reach out to our customer support team. We're here to help you get the most out of your Wrench Rails.
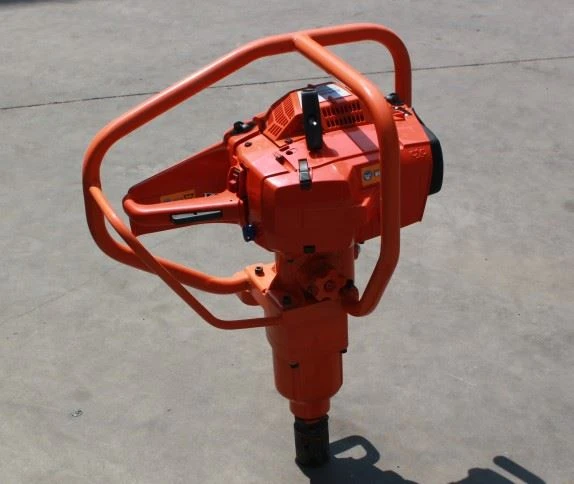

And if you're in the market for a new Wrench Rail, we'd love to hear from you. We offer a wide range of high-quality products at competitive prices. Contact us today to start a conversation about your procurement needs.
References
- Manufacturer's user manuals for Single Socket Rail Bolt Wrench, Light Weight Portable Rail Bolt Wrench, and Battery Torque Wrench smart torque wrench.