




How to clean a Rail Cutter?
 Dec 09, 2025|
 Regular maintenance and cleaning of a rail cutter are essential to ensure its optimal performance, extend its service life, and maintain safety standards. As a trusted rail cutter supplier, we understand the importance of proper cleaning procedures. In this blog, we'll guide you through the step - by - step process of cleaning a rail cutter.
Preparation
Before you start cleaning the rail cutter, it's crucial to take some preparatory steps to ensure your safety and the effectiveness of the cleaning process.
-
Power Off and Disconnect: First and foremost, turn off the rail cutter and disconnect it from the power source. This could be unplugging it from an electrical outlet if it's an electric model or shutting off the fuel supply and ignition for a gasoline - powered one. This step prevents accidental startup during the cleaning process, which could lead to serious injuries.
-
Gather Cleaning Supplies: You'll need a variety of cleaning supplies. These typically include a soft - bristle brush, a clean cloth, a mild detergent or a specialized machine cleaner, a lubricant, and safety equipment such as gloves and safety glasses. The soft - bristle brush is used to dislodge dirt and debris from hard - to - reach areas without scratching the surface of the rail cutter. The clean cloth is for wiping down the machine after cleaning, and the mild detergent helps to break down grease and grime.
-
Choose a Suitable Location: Select a well - ventilated area to perform the cleaning. If you're using a gasoline - powered rail cutter, proper ventilation is essential to prevent the buildup of harmful fumes. An open garage or an outdoor area would be ideal.
External Cleaning
The external parts of the rail cutter are often exposed to dirt, dust, and debris during operation. Cleaning these parts regularly helps to maintain the machine's appearance and prevent corrosion.
- Remove Loose Debris: Use the soft - bristle brush to gently remove any loose dirt, dust, or metal shavings from the exterior of the rail cutter. Pay special attention to areas around the cutting blade, handles, and control panels. This initial brushing helps to prevent the dirt from being spread around during the subsequent cleaning steps.
- Prepare the Cleaning Solution: Mix a small amount of mild detergent with water in a bucket. Make sure the solution is not too concentrated, as a strong detergent could damage the paint or other finishes on the rail cutter.
- Wipe Down the Exterior: Dip the clean cloth into the cleaning solution and wring it out so that it's damp but not dripping. Wipe down the entire exterior of the rail cutter, including the body, handles, and any exposed metal parts. For stubborn stains or grease, you can use the soft - bristle brush to gently scrub the area. After wiping, use a dry cloth to remove any remaining moisture. This helps to prevent rusting.
Cleaning the Cutting Blade
The cutting blade is the most critical part of the rail cutter, and keeping it clean is essential for efficient cutting performance.
- Inspect the Blade: Before cleaning, carefully inspect the cutting blade for any signs of damage, such as chips or dullness. If the blade is damaged, it may need to be replaced.
- Remove the Blade (if possible): Some rail cutters allow for easy removal of the cutting blade. If this is the case with your machine, follow the manufacturer's instructions to safely remove the blade. This makes it easier to clean both the blade and the area where it is installed.
- Clean the Blade: Dip the blade into the cleaning solution and use the soft - bristle brush to gently clean both sides of the blade. Pay close attention to the cutting edges, as these are the areas that come into contact with the rail and are most likely to accumulate debris. After cleaning, rinse the blade thoroughly with clean water and dry it completely with a cloth. Applying a thin layer of lubricant to the blade can help prevent rust and keep it in good working condition.
Internal Components Cleaning
While the external parts are more visible, the internal components of the rail cutter also require regular cleaning to ensure smooth operation.
- Access the Internal Areas: Some rail cutters have panels or covers that can be removed to access the internal components. Refer to the user manual to find out how to safely remove these covers. Be careful not to damage any wires or other components during the removal process.
- Remove Dust and Debris: Use the soft - bristle brush to gently remove any dust, dirt, or debris from the internal components. This may include the motor, gears, and other moving parts. If there is a significant amount of grease or grime, you can use a small amount of the cleaning solution on the brush to help break it down.
- Lubricate Moving Parts: After cleaning the internal components, apply a small amount of lubricant to the moving parts, such as the gears and bearings. This helps to reduce friction and wear, ensuring that the rail cutter operates smoothly. Make sure to use the lubricant recommended by the manufacturer.
Reassembly and Final Checks
Once the cleaning process is complete, it's time to reassemble the rail cutter and perform some final checks.
- Reinstall the Blade and Covers: If you removed the cutting blade and any covers during the cleaning process, carefully reinstall them according to the manufacturer's instructions. Make sure all parts are properly aligned and tightened.
- Wipe Down the Entire Machine Again: Use a clean, dry cloth to wipe down the entire rail cutter one last time to remove any remaining moisture or cleaning solution.
- Perform a Function Check: Reconnect the rail cutter to the power source (or refill the fuel if it's a gasoline - powered model) and perform a function check. Turn on the machine and make sure all controls are working properly and the cutting blade rotates smoothly.
Additional Tips and Recommendations
- Regular Cleaning Schedule: Establish a regular cleaning schedule for your rail cutter. Depending on the frequency of use, a monthly or quarterly cleaning may be appropriate. Regular cleaning helps to prevent the buildup of dirt and grime, which can lead to more significant problems over time.
- Inspect for Wear and Tear: During the cleaning process, take the opportunity to inspect the rail cutter for any signs of wear and tear. Check the cutting blade, belts, and other components for damage. If you notice any issues, address them promptly to avoid further damage to the machine.
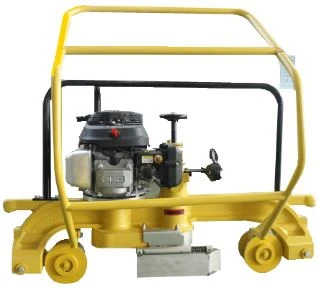
As a leading rail cutter supplier, we also offer a range of complementary products such as the Internal Combustion Rail Grinding Machine Rail Grinder, GYDM - III Rail Waist Grinding Machine, and DGM - 2.2 Multi - function Rail Grinding Machine. These products are designed to work in conjunction with our rail cutters to provide comprehensive rail maintenance solutions.
If you're interested in purchasing our rail cutters or any of our other products, or if you have any questions about cleaning and maintaining your rail cutter, we encourage you to contact us for a procurement discussion. Our team of experts is ready to assist you in finding the right solutions for your rail - cutting needs.
References
- Manufacturer's user manuals for rail cutters
- Industry standards for rail cutter maintenance and cleaning