




What are the procedures for rail adjustment in winter?
 Nov 25, 2025|
 Yo, folks! As a supplier in the rail adjustment game, I'm here to break down the procedures for rail adjustment in winter. Winter can be a real pain in the neck for rail systems. The cold temperatures cause the rails to contract, which can lead to all sorts of issues like increased stress, potential breaks, and misalignments. So, getting the rail adjustment right during this season is super crucial.
Pre - adjustment Inspection
Before we even start adjusting the rails, we gotta do a thorough inspection. This is like a health check - up for the rails. We go along the tracks, looking for any visible signs of damage, like cracks or bends. We also measure the rail gaps. In winter, these gaps can change due to the contraction of the rails. Using some high - tech measuring tools, we note down the current gap sizes at regular intervals.
Another important thing we check is the fasteners. Cold weather can make the fasteners loosen up. Loose fasteners can't hold the rails in place properly, which can lead to instability. So, we make sure all the fasteners are tight and in good condition. If we find any loose ones, we tighten them right away. And if there are any damaged fasteners, we replace them.
Planning the Adjustment
Once we've completed the inspection, it's time to plan the adjustment. Based on the data we collected during the inspection, we figure out how much adjustment is needed. We calculate the ideal rail gap sizes for the winter conditions. This calculation takes into account things like the type of rail, the local climate, and the expected temperature range.
We also plan out the sequence of the adjustment. We can't just start adjusting randomly. We need to work section by section, starting from one end of the track and moving forward. This helps us keep everything organized and ensures that the adjustment is consistent across the whole track.
Tools and Equipment Preparation
To get the job done, we need the right tools. One of the key tools we use is the Hydraulic Rail Stressor. This bad boy is used to apply stress to the rails. It can stretch or compress the rails as needed to adjust the gaps. It's a powerful and reliable tool that makes the adjustment process a lot easier.
Another essential piece of equipment is the YLS - 900 Hydraulic Rail Tensor. This tensor is great for accurately measuring and controlling the tension in the rails. It helps us make sure that the rails are under the right amount of stress, which is crucial for maintaining their stability.
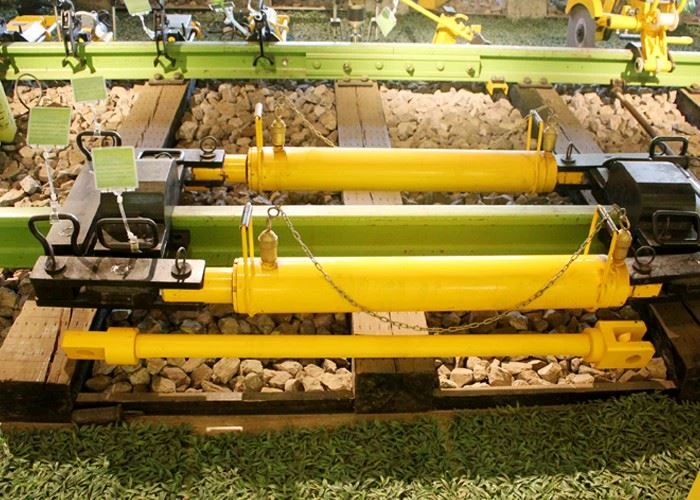
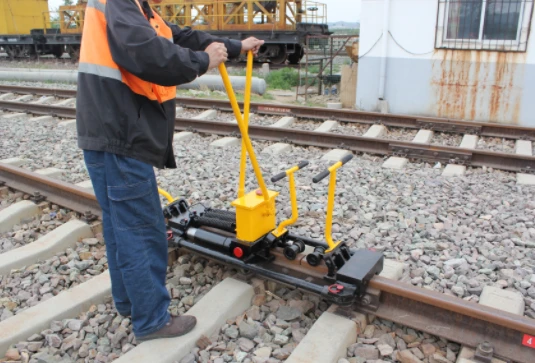
We also use the Hydraulic Rail Gap Adjuster. As the name suggests, this tool is specifically designed to adjust the rail gaps. It's very precise and can make small adjustments to get the gaps just right.
Rail Adjustment Process
Now, let's get into the actual adjustment process. First, we set up the tools at the section of the track where we're starting the adjustment. We make sure everything is properly connected and working.
We start by using the hydraulic rail stressor to apply stress to the rails. If the rails are too close together and the gaps are too small, we use the stressor to stretch the rails. This creates more space between them. On the other hand, if the gaps are too large, we use the stressor to compress the rails a bit.
While applying the stress, we constantly monitor the tension in the rails using the YLS - 900 Hydraulic Rail Tensor. We want to make sure that the tension is within the safe range. If the tension gets too high, it can damage the rails.
Once we've adjusted the stress in the rails, we use the hydraulic rail gap adjuster to fine - tune the gaps. We measure the gaps again and make any necessary small adjustments until we reach the ideal gap size that we calculated during the planning phase.
We repeat this process section by section along the entire track. After each section is adjusted, we double - check the fasteners to make sure they're still tight. If they've loosened up during the adjustment, we tighten them again.
Post - adjustment Checks
After we've finished adjusting all the sections of the track, we do a final check. We go over the whole track one more time, looking for any signs of issues. We measure the rail gaps again to make sure they're all within the correct range. We also check the tension in the rails to ensure that everything is stable.
We inspect the fasteners once more to make sure they're secure. And we look for any new signs of damage that might have occurred during the adjustment process. If we find any problems, we fix them right away.
Maintenance and Monitoring
Rail adjustment isn't a one - time thing. After the adjustment, we need to maintain and monitor the rails regularly. We keep an eye on the rail gaps and the tension in the rails. We also check the fasteners frequently to make sure they stay tight.
During the winter, the weather can be unpredictable. Sudden drops in temperature can cause the rails to contract further. So, we need to be ready to make additional adjustments if necessary.
If you're in the market for high - quality rail adjustment tools and equipment, we're here to help. We've got a wide range of products, including the ones I mentioned above, that are designed to make rail adjustment in winter a breeze. Whether you're a small railway operator or a large - scale transportation company, we can provide you with the solutions you need. If you're interested in learning more or want to discuss your specific requirements, feel free to reach out to us. We're always happy to have a chat and help you find the best products for your rail adjustment needs.
References
- Railway Engineering Handbook, various editions
- Industry guidelines on winter rail maintenance and adjustment.