





Inspection of turnout geometry
 Jun 19, 2023|
 (i) Purpose
To master the change law of the geometric position of the turnout, discover the deviation of the static geometry of the turnout, and provide the basis for the maintenance of the turnout.
(B) turnout inspection cycle
1. monthly inspection of the main line turnout is not less than 1 time, key locations should be strengthened to check, and make records.
2. moving line and ballast line turnout should be inspected at least once a month.
3. to and from the line, station line (including moving station) turnout no less than 1 time per quarter, key areas should be strengthened to check, and keep records.
(iii) Preparation of tools and materials
Track geometric condition measuring instrument, track intelligent inspection instrument, electronic track ruler, support distance ruler, tip rail lowering value measuring instrument, string rope, caliper, steel straightedge, record paper, stone pen, etc.
(D) Inspection requirements and content
1. Main line turnout inspection
① use electronic road gauge check, gauge, level: turnout, fork parts every other rail sleeper check one, joint parts must check other parts in accordance with table 2.2-2 check and record, track intelligent checker when the straight stock according to every 0.5m output data, curved stock with electronic road gauge in accordance with table 2.2-2 check and record.
②Height and direction check: look at all aspects, focus on the check, use the string rope to check the height and direction of the turnout locally.
③Checking distance: Use distance ruler to check distance at each point.
④Lowering value measurement: measure the lowering value of the tip rail in relation to the basic rail and the heart rail in relation to the wing rail (quarterly check).
⑤ Key point inspection: check the inspection interval, the width of the guard rail rim slot and the opening range.
2. To the hairline turnout inspection
① Check the gauge and level with electronic ruler according to table 2.2-2 and record, and ask the joint part to be checked.
②High and low, direction check: comprehensive view, key check, use string rope to check the height and direction of the turnout.
③Checking the distance of support: use the distance of support to check the distance of support at each point.
④Lowering value measurement: measure the lowering value of the tip rail in relation to the basic rail and the heart rail in relation to the wing rail (quarterly check).
(⑤ check the interval of checking, the width of the guard rail rim slot and open range.
(v) Preparation before operation:
1. check whether all kinds of gauges are qualified and effective, whether the power of electronic road gauge is sufficient.
2. intelligent inspection instrument must be calibrated on the calibration table before going on the road, to confirm that the instrument performance is good, to ensure that the battery power is sufficient.
3. the lighting equipment is complete and good. 4.
4. all kinds of record paper and pencil are available.
(vi) Inspection methods and procedures
1. Determine the reference strand of the turnout first, straight strand with straight outer strand as the standard strand, guide curve with guide curve on the strand as the reference strand, horizontal reference strand height as "+" number, and vice versa as "-" number.
2. Visually see the big height and direction, stand outside the turnout at about 30-50m, visually see the direction and height of the turnout.
3. Check the level of the electronic road gauge. Firstly, place the ruler horizontally on the two rails, and mark the two ends of the ruler with a stone pencil, make a good record of the horizontal reading at this time, then turn the ruler around and place it at the same position as the original line, confirm the horizontal reading at this time again, compare the difference between the two horizontal readings, when the difference between the two horizontal readings is ≥0.5mm, the ruler is forbidden to use on the road, and send it for inspection in time.
4. check the gauge, level, check the interval. The gauge is placed horizontally at the position of the measuring point, so that the gauge is perpendicular to the centre line of the gauge, measure the minimum distance between the two rails, measure the horizontal height difference between the two rails, require the reading of the electronic track gauge to be stable after reading the horizontal value of the gauge at this time, and record the horizontal value of the gauge with a stone pen at the bottom foot of the rail, first gauge after level; find the interval check, the gauge is placed within 20-30mm of the top surface width of the long heart rail Check, track gauge ruler perpendicular to the track gauge centre line, first find out the minimum track gauge here, then measure the minimum distance between the heart rail role side and the guard rail role side, and have a stone pen in the guard rail top surface record track gauge, level and find out the interval value.
5. check the guide curve support distance. Use the branch distance ruler to measure each branch distance point data (that is, guide curve part outside the straight stock rail work side to guide curve on the stock work side of the distance), check when the front of the branch moment ruler two pivot points to be close to the straight basic rail role side can not have a gap, the back end of the measurement pivot point to be close to the guide curve on the stock rail role side, in order to read the reading on the ruler at this time and retain 1 decimal place.
6. pointed rail to reduce the value of measurement: measurement before the measuring instrument in the calibration plate for calibration, the error value required less than 0.1mm can be used, measurement according to the need to measure the specified premises, the measuring instrument placed horizontally on the two basic rails perpendicular to the centre of the point to be measured, and then slowly move the measuring instrument to check the pivot point, when the measuring instrument pivot point and pointed rail top surface centre position vertical, press the handle to read out the reading at this time and make a record.
7. Check the height and direction: when measuring the height, 2 people cooperate to pull the string, according to the visual find out the highest point or the lowest point of the rail surface, use 10m string to measure the string to the top of the rail vector value; when measuring the direction, 2 people cooperate to pull the string, according to the visual find out the most convex or most concave point of the side of the rail head, in the side of the rail head work side, use 10m string to measure the string to the rail head work side vector value. Note: The string must be tightened to prevent sagging during the measurement.
8. Measure the straightness of the working edge of the pointed rail. When measuring, 2 people work together to pull the string and use the 10m string to measure the string to the working edge vector value at the side of the rail head (working edge of the pointed rail).
9. Measure the straightness of the working edge of the straight strand of the heart rail. When measuring, 2 people work together to pull the strings and use 10m strings on the side of the rail head (working side of the heart rail) to measure the strings to the working side vector value.
10. turnout frame measurement: turnout frame is the distance between the straight curved basic rail action side. When measuring, according to the marking point of the two rails, use one end of the tape measure to hold the edge of one basic rail, and use the tape measure to pull to the reading of the edge of the other basic rail, according to the different types of turnouts in order to measure point by point, note (when measuring to prevent short circuit of the track circuit, to have certain protective measures, generally available insulating material pad on the top surface of the sharp rail, reading end of the tape measure can not contact with the basic rail).
11. Measurement of the open range of the rutting device section: the open range is the minimum distance between the non-action side of the pointed rail and the action side of the basic rail, using a caliper to slide between the basic rail and the pointed rail (at 16mm of the working side) to confirm the narrowest point and measure the data.
12. Checking the width of the rim groove of the guard rail: use a steel ruler to measure the width of the rim groove of the flat section, the buffer section and the open section of the guard rail.
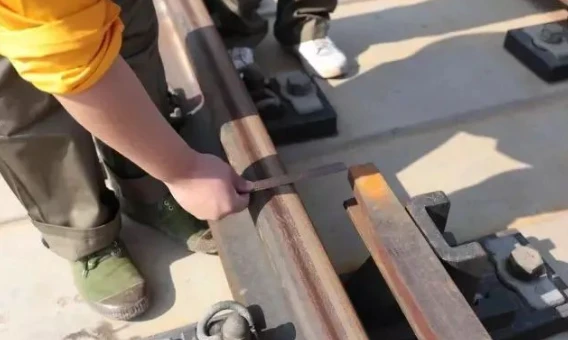
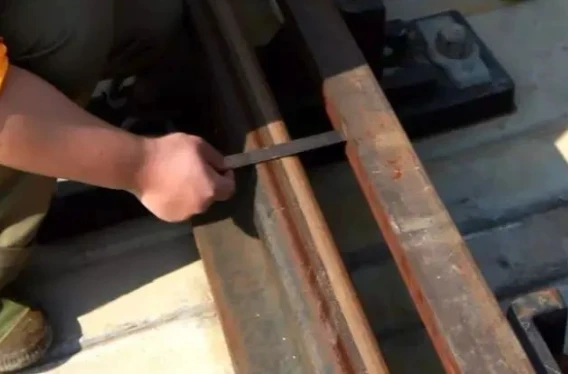
13. movable heart rail fork throat width: use a steel ruler to measure the movable heart rail fork throat width.
(vii) scribing
According to check out the size of each ministry against the technical standards to determine the workload, require scribing reasonable, not wrong scribing, not wrong scribing. Determine the high and low, direction workload to arrange 1 person point pry, with a stone pen in the bottom of the rail good disease always point mark, note (scratch level pry combined with high and low scratch pry, the pad place on the pad the fall place on the fall, high and low pry to combine the big high and low scratch, the fall of the pry resolutely not smooth pry the smooth pry resolutely not fall, can not make the small slow puddle into a big slow puddle. When paddling direction pry should be combined with the big direction pry, can not make the small direction into a big direction. (The support moment paddling should be combined with the direction of the outer straight stock, first ensure that the outer straight stock direction is good, in determining the guide curve support moment, in controlling the straight curved stock gauge).